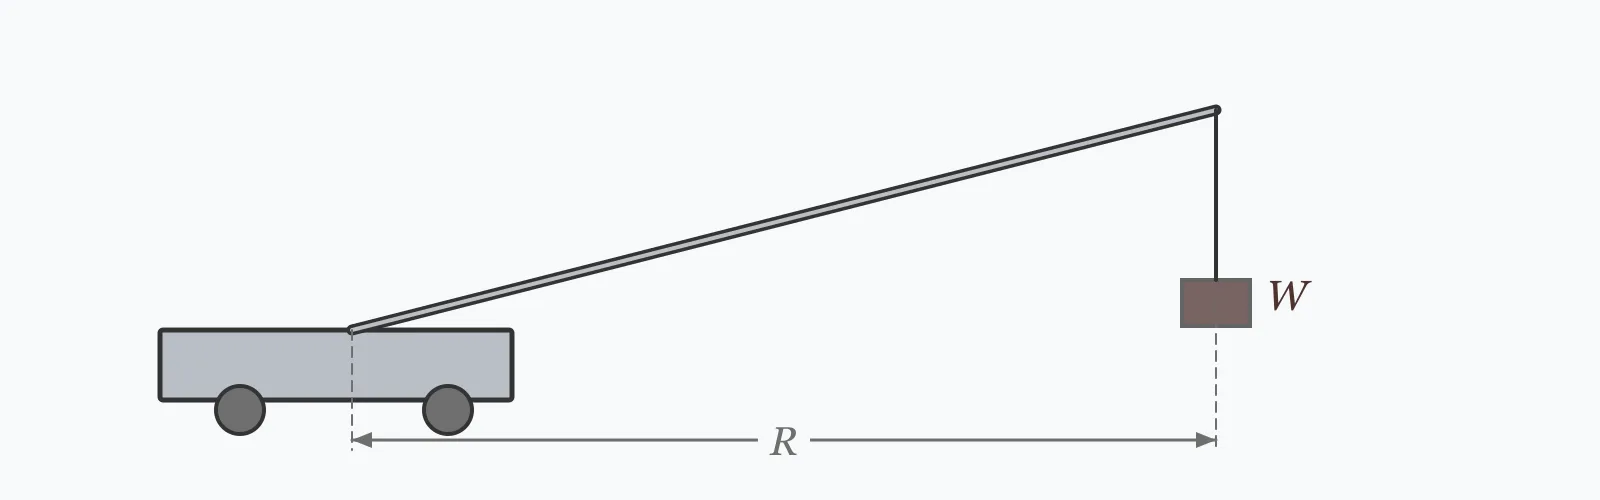
A crane is limited by load moment, so its capacity falls in inverse proportion to radius: a machine rated 25 tonnes at 8 metres manages exactly 10 at 20. Enter the rated capacity and radius, the working radius, the load and the rigging weight to get the available capacity, the gross load and the percentage of chart capacity used.
Calculator
Units:
t
Capacity at the reference radius, from the chart
m
The radius at which that capacity applies
m
Distance from centre of rotation to the load, measured under load
t
The item being lifted
t
Hook block, slings, shackles, beams and frames
Calculation Result
Press Calculate for the capacity available at your working radius, the gross load including rigging, the percentage of chart capacity that represents, and the margin remaining. Planned lifts are commonly limited to 80 to 90%.
Step-by-Step Solution
Preliminary design aid. Results follow the published formulas cited
below and are intended for estimating, study and early design. Final design must be
verified by a licensed Professional Engineer against the code in force for your project.
Key Benefits
✓Shows how sharply capacity falls with radius
✓Counts rigging weight against capacity, where it belongs
✓Reports utilisation as a percentage, which is how lifts are assessed
✓Warns above the 90% threshold most site rules impose
✓Sensitivity chart shows the reciprocal capacity curve
✓Shareable links and CSV export for lift plan records
What Is Crane Capacity?
A crane resists a load moment — the load multiplied by its horizontal distance from the centre of rotation. Because that product is what the machine is built to withstand, capacity at any radius follows from the rating at a known one: a 25 tonne capacity at 8 metres is a 200 tonne-metre rating, which gives 10 tonnes at 20 metres. Capacity and radius are inversely proportional, so moving out costs capacity faster than it feels.
Everything below the hook counts
Chart capacity is the total the machine may support, not the payload it may deliver. Hook block, slings, shackles, spreader beams and lifting frames all hang below the hook and subtract directly. On the worked example a 1.2 tonne rigging assembly consumes 13% of the gross load, and on lifts using a substantial spreader beam the proportion is considerably higher.
Why a real load chart is more complicated
The moment relationship used here is the underlying principle, not the whole chart. Actual capacities also depend on boom length, boom angle, counterweight configuration, outrigger extension and the quadrant being worked in — capacity over the side of a mobile crane is often far below capacity over the rear. This calculation is for understanding and screening; the machine's own chart governs the lift.
Formula
M_rated = C_rated × R_rated
Rated load moment in tonne-metres, from a known capacity and radius pair
Related Formulas
C = M_rated / R
W_gross = W_load + W_rigging
Utilisation = W_gross / C × 100%
Variable Definitions
Symbol
Variable
Unit
Description
C_rated
Rated Capacity
t
Capacity at the reference radius, from the crane's chart.
R_rated
Rated Radius
m
The radius at which the rated capacity applies.
R
Working Radius
m
Horizontal distance from the centre of rotation to the load, under load.
W_load
Load Weight
t
The item being lifted.
W_rigging
Rigging Weight
t
Hook block, slings, shackles and any beam or frame.
M
Load Moment
t·m
Capacity times radius — the quantity the machine is rated on.
How to Use This Calculator
Take the rated pair from the machine's chartAny capacity and radius pair from the chart defines the moment rating. Use a point in the working range rather than the headline maximum capacity, which usually applies at a very short radius the lift will never use.
Measure radius to the load, under loadRadius runs from the centre of rotation to the centre of the load, and it increases as the boom deflects. A lift planned on the unloaded radius is planned short, and the error grows with the load.
Include everything below the hookHook block, slings, shackles, spreader beams and lifting frames all count. A spreader beam is often a tonne or more, and omitting it is the commonest way a lift plan understates the gross load.
Keep planned lifts below 80 to 90%Wind, load swing, out-of-level and any error in the estimated weight all consume the remainder. Most operators and many site rules cap planned utilisation well short of 100%.
Confirm against the actual chart before liftingThe moment relationship is the principle, not the chart. Boom length, boom angle, counterweight, outrigger extension and working quadrant all modify the real capacity, and capacity over the side can be far below capacity over the rear.
Worked Examples
Example 1
A crane rated 25 tonnes at 8 metres lifting an 8 tonne load with 1.2 tonnes of rigging at a working radius of 16 metres.
Step-by-Step Solution
Rated load moment: 25 t × 8 m = 200 t·m
Capacity at 16 m: 200 / 16 = 12.50 t
Gross load: 8.0 + 1.2 = 9.20 t
Utilisation: 9.20 / 12.50 = 73.6% of chart capacity
Margin remaining: 12.50 − 9.20 = 3.30 t
Note that doubling the radius from 8 to 16 m halved the capacity, from 25 t to 12.5 t
Interpretation: 73.6% is within the usual planning limit, but the rigging alone accounts for 13% of the gross load. Omitting it would have shown 64% and understated the lift.
Example 2
The same load at increasing radius, showing how quickly the margin disappears.
Step-by-Step Solution
At 8 m: capacity 25.00 t, utilisation 36.8%, margin 15.80 t
At 10 m: capacity 20.00 t, utilisation 46.0%, margin 10.80 t
At 12 m: capacity 16.67 t, utilisation 55.2%, margin 7.47 t
At 16 m: capacity 12.50 t, utilisation 73.6%, margin 3.30 t
At 20 m: capacity 10.00 t, utilisation 92.0%, margin 0.80 t
The radius has increased by a factor of 2.5 and the margin has fallen from 15.80 t to 0.80 t — a factor of nearly twenty.
That is the shape of a reciprocal curve. Capacity falls fastest in absolute terms close in, but the margin falls fastest at the far end because the gross load is fixed while the capacity keeps shrinking towards it.
At 20 m the lift is at 92% and would be refused under most site rules. Four more metres of radius has taken it from comfortable to unacceptable, which is why the position of the crane matters as much as its size.
Radius Sensitivity
Capacity falls as a reciprocal of radius, so the curve is steep close in and flattens further out. Utilisation rises to meet it. The point where the two cross is where the lift stops being possible. The marker shows your current radius.
Capacity at Working Radius vs Working Radius
Recomputed live from your inputs. The marker shows your current value.
Line chart of Capacity at Working Radius against Working Radius. The same
values are listed in the data table below.
Values plotted above, sampled across the working radius range.
How to Interpret Your Results
Utilisation is the figure lifts are assessed on. What matters alongside it is how close the working radius is to the limit, because capacity falls faster than the radius grows.
Chart Capacity Used: < 50Comfortable margin
At your result% of chart capacity the lift has substantial reserve. There is room for the load to be heavier than estimated, or for the radius to be greater than planned — both of which happen more often than either is admitted.
Chart Capacity Used: 50 – 80Normal planning range
At your result% of chart capacity the lift sits in the usual planning range. Confirm the radius is measured under load and that all rigging has been counted, since both errors move in the unsafe direction.
Chart Capacity Used: 80 – 100Little margin — review the plan
At your result% of chart capacity there is minimal reserve. Wind, load swing, out-of-level and weight estimation error all consume what remains, and most site rules cap planned lifts below this. Reduce the radius or use a larger machine.
Chart Capacity Used: ≥ 100Over capacity
At your result% the gross load exceeds what the crane can support at this radius. The lift cannot proceed as planned. Reposition the crane to shorten the radius, split the load, or use a machine with a higher moment rating.
Capacity at Working Radius: < 1Very low capacity at this radius
A capacity of your result t at this radius suggests the machine is being worked far beyond its useful range. Check the rated pair entered — the headline capacity of a crane applies at a short radius that most lifts never use.
Common Mistakes to Avoid
Omitting the rigging weight
Why it matters:Chart capacity is what the crane may support in total, not what it may deliver. Hook block, slings and any beam hang below the hook and count fully — 1.2 t of rigging is 13% of the gross load in the worked example.
✓How to avoid it:Weigh or calculate every item below the hook. Spreader beams and lifting frames are the largest and the most often forgotten.
Using the unloaded radius
Why it matters:The boom deflects under load, so the radius when lifting exceeds the radius when the boom was positioned. The error grows with the load, meaning it is largest exactly when the margin is smallest.
✓How to avoid it:Plan on the loaded radius. Modern machines display it directly, and the difference on a long boom at high utilisation is not small.
Treating the headline capacity as generally available
Why it matters:A crane advertised as 25 tonnes is 25 tonnes at one short radius. At 20 metres the same machine manages 10 tonnes, and choosing a crane by its headline figure without checking the working radius is how lifts are found to be impossible on the day.
✓How to avoid it:Select the machine on the capacity at the radius the lift actually needs, which is what the load moment relationship gives.
Planning to 100% of chart capacity
Why it matters:The chart figure is the limit under ideal conditions. Wind, load swing, ground out-of-level and the difference between estimated and actual weight all erode it, and none of them is under the operator's control during the lift.
✓How to avoid it:Plan to 80 to 90% at most, and lower for loads whose weight is uncertain or for lifts in exposed conditions.
Assuming capacity is the same in every direction
Why it matters:A mobile crane on outriggers is far stronger over the rear than over the side, because the outrigger spread and the counterweight geometry differ. Charts state capacities by quadrant for exactly this reason.
✓How to avoid it:Read the capacity for the actual working quadrant, and remember that a lift which slews from rear to side may pass out of chart during the slew.
Ignoring ground bearing under the outriggers
Why it matters:The whole load moment is resolved into vertical forces at the outrigger pads, and those pressures are high. Outrigger failure through soft ground, a buried service or a basement slab is a recognised cause of crane overturning.
✓How to avoid it:Calculate the outrigger reactions and check them against the ground bearing capacity, using mats to spread the load where necessary.
Practical Applications
▸Screening whether a crane can make a planned lift
▸Selecting a machine for a known load and radius
▸Assessing the effect of crane position on capacity
▸Checking utilisation against site limits
▸Understanding how capacity varies across a lift arc
▸Quantifying the effect of rigging weight on a lift
Industry Use Cases
Construction lifting
Crane position is chosen before crane size, because capacity depends on radius so strongly. Moving a machine four metres closer can be worth more than upgrading to the next size, and it costs nothing but access.
Lift planning
Appointed persons prepare lift plans that state the load, the rigging, the radius and the resulting utilisation. Every one of those four is checked, and the rigging weight is the one most often found understated on review.
Tower crane installation
Tower cranes are rated on load moment explicitly, with charts quoting capacity against radius along the jib. The relationship used here is exactly how those charts are constructed, subject to a maximum hook capacity close in.
Expert Tips
💡Capacity is inversely proportional to radius — double the radius, halve the capacity.
💡Everything below the hook counts, including the hook block itself.
💡Radius grows as the boom deflects, so plan on the loaded figure.
💡Headline capacity applies at one short radius, not generally.
💡Plan to 80 to 90% of chart, never to 100%.
💡Capacity over the side is usually well below capacity over the rear.
Advantages & Limitations
Advantages
✓Makes the inverse relationship between capacity and radius explicit
✓Counts rigging against capacity, where charts require it
✓Reports utilisation, which is how lifts are actually assessed
✓Warns at the threshold most site rules impose
✓Fast enough to test crane positions during planning
Limitations
!A simplified moment relationship, not a substitute for the machine's chart
!Takes no account of boom length, boom angle or counterweight configuration
!Ignores the quadrant of operation, where real capacities differ substantially
!Does not apply the maximum hook capacity that limits short-radius lifts
!Assumes a level machine on adequate ground with outriggers fully extended
!Does not calculate outrigger reactions or ground bearing pressure
!Makes no allowance for wind, which restricts lifting well before it threatens stability
How Capacity Falls With Radius
A crane rated 25 t at 8 m — a 200 t·m machine — lifting a 9.2 t gross load. Capacity falls as a reciprocal while the load stays fixed, so the margin collapses at the far end.
200 t·m rating, 8 t load plus 1.2 t rigging. The radius increases 2.5 times and the margin falls from 15.80 t to 0.80 t — a factor of nearly twenty. The last four metres take the lift from comfortable to beyond what most site rules permit.
Multiply a known capacity and radius pair to get the load moment, then divide by the working radius. A 25 t at 8 m machine is 200 t·m, which gives 12.5 t at 16 m.
Why does capacity fall with radius?
Because a crane resists a load moment — load times horizontal distance. The moment is fixed by the machine, so capacity and radius are inversely proportional.
Does rigging count against crane capacity?
Yes, in full. Hook block, slings, shackles, spreader beams and lifting frames all hang below the hook. In the worked example 1.2 t of rigging is 13% of the gross load.
What utilisation is acceptable for a planned lift?
80 to 90% at most. Wind, load swing, machine out-of-level and errors in the estimated weight all consume the remainder, and none is controllable during the lift.
Is the radius measured with the load on?
It should be. The boom deflects under load, so the loaded radius exceeds the unloaded one — and the difference is largest at high utilisation, exactly when the margin is smallest.
Why is a crane's advertised capacity higher than what it lifts?
Because the headline figure applies at one short radius. The same 25 t machine manages 10 t at 20 m, which is why cranes are selected on capacity at the working radius rather than on the name.
Does capacity depend on which way the crane is facing?
Yes, considerably for a mobile crane. Outrigger spread and counterweight geometry differ between quadrants, and capacity over the side is usually well below capacity over the rear.
What is a load moment indicator?
The system that continuously computes the load moment from measured load and radius and warns or cuts out as the limit approaches. It enforces the same relationship this calculation uses.
Do I need to check the ground under the outriggers?
Yes. The load moment resolves into high vertical forces at the pads, and outrigger failure through soft ground or a buried void is a recognised cause of overturning. Mats spread the load where bearing capacity is inadequate.
How does wind affect a lift?
It restricts lifting well before it threatens stability, because wind on a large surface area load makes it uncontrollable. Manufacturers state a maximum wind speed, and it is often the limit that stops work rather than capacity.
Glossary
Load moment
Load multiplied by horizontal radius, the quantity a crane is rated on.
Working radius
Horizontal distance from the centre of rotation to the centre of the load.
Gross load
Everything below the hook: the load plus all rigging.
Rigging
Hook block, slings, shackles, beams and frames used to attach the load.
Spreader beam
A beam holding lifting points apart, often weighing a tonne or more itself.
Utilisation
Gross load as a percentage of the chart capacity at that radius.
Quadrant
The sector of the slewing circle being worked in, over which capacity varies.
Load moment indicator
The system that monitors load and radius and warns as the limit approaches.
Outrigger reaction
The vertical force at an outrigger pad, checked against ground bearing capacity.
Appointed person
The individual responsible for planning a lifting operation.
Scientific & Standards References
BS 7121 — Code of practice for safe use of cranes — British Standards Institution
ISO 4301 — Cranes and lifting appliances: Classification — International Organization for Standardization
LOLER — Lifting Operations and Lifting Equipment Regulations — UK Health and Safety Executive
ASME B30.5 — Mobile and Locomotive Cranes — American Society of Mechanical Engineers
CPA Technical Information Note — Ground Conditions for Mobile Cranes — Construction Plant-hire Association
Conclusion
Crane capacity is governed by load moment, so it falls as a reciprocal of radius — a 200 tonne-metre machine gives 25 tonnes at 8 metres and exactly 10 at 20. The consequence that matters is in the margin rather than the capacity: with a fixed 9.2 tonne load, the table above shows the reserve collapsing from 15.8 tonnes to 0.8 as the radius grows by a factor of 2.5. Four extra metres at the far end takes a comfortable lift past what most site rules permit, which is why where the crane stands is often a more powerful decision than which crane it is. Two errors compound that, and both push the same way. Rigging counts in full against capacity — 13% of the gross load in the example — and radius grows as the boom deflects, so a lift planned on the unloaded figure is planned short precisely when the margin is thinnest. Neither this calculation nor any rule of thumb replaces the machine's own chart, which also varies with boom configuration and working quadrant.
Enter your crane rating, radius and load above to check the utilisation.